Showing posts with label American Needlepoint Guild. Show all posts

Tuesday, 16 August 2022

Tucson

 Eight months!! I blame the three L's. Lassitude, Life and Laziness.

I've been busy, but I couldn't share until after the ANG Seminar in Tucson. We got back last Monday and slept for two days, but now we're catching up.

To bring you up to date with "The Big Project" I kept mentioning, it was for the Exhibit at the ANG Seminar, so I didn't want it to be seen until then. It was both a risk and an adventure I will probably write more about later, but here is the finished article.

It's called "Heraldic Carousel" and measures just over 12 inches high. Each side is 4" across and the baseboard is 12"x12".


It does what it says in the title, it's based on heraldry, and it's a carousel. 
The sides along the bottom are the heraldic ordinaries set in shields. The ordinaries are gold or silver (Or and Argent), with the couching on the shields in the heraldic tinctures of red (Gules), green (Vert), blue (Azure) and Purple (Purpre). The background to each panel is Milanese stitch, also in the heraldic tinctures, with a Basketweave border in brown.
The creatures are the heraldic beasts, Unicorn, Leopard, Griffin, Hippocampus, Lion, Dragon, Sea Lion and Wyvern. They are all double sided. The 'beasts' are worked in Kreinik braids and the background in Soie d'Alger, in Basketweave.
Above them, the red and blue swags, are Beattie stitch turned on its side to emulate hanging fabric. The tent like top is natural calico.
All the embroidery was worked on Congress Cloth. 
The frame is balsa wood, because it had to be light enough to carry, and inside is a musical movement which plays Brahms Lullaby when the handle at the top is turned.

I have to say that when I submitted this as an Exhibit entry I had no expectation of winning anything - possibly an Honourable Mention because it is a bit unusual. The main reason for creating Heraldic Carousel was to make people look at it and think "S**t! You can do that with Needlepoint? Wow!" It certainly got that reaction.

Surprisingly (to me), when it appeared in the Exhibit it did so with a Blue Ribbon - First in Professional Original! Later in Seminar it was also awarded "Creative Inspiration" and, I had to stuff my napkin in my mouth to stop me screaming when the next one was announced, "Best of Show".


Ribbons are so cool. Creative Inspiration is a beaded Gila Monster, Best of Show is a perfect little hummingbird.

And did it work?


It took me nearly 900 hours to make Heraldic Carousel. There was much failure, much pain and much heart rending, and I doubt if I'll ever do something like that again.


Thursday, 25 November 2021

Return of The Pod People

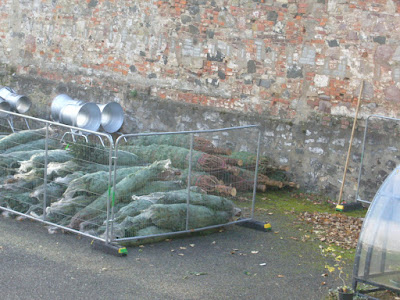
 As we come to the end of November, what we call "The Pod People" return. Looking out of my back window I can see this:


Every year at this time there is a gathering of Christmas Trees for distribution in the yard next door. Wrapped as they are, they always remind me of the 1956 film "Invasion of the Body Snatchers.
I think if you look at the still from the movie it's kind of self explanatory.


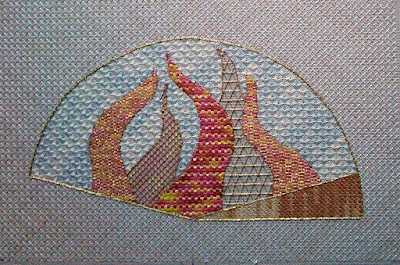
Back in May I mentioned that I had been selected to teach my "Flame Fan" at the American Needlepoint Guild Seminar 2022, in Tucson, Arizona. I didn't feel quite right about sharing "Flame Fan" until the classes were advertised, but as they are now up on the ANG website, I think its OK to do so.


I was supposed to be running a pilot class this week, but due to various circumstances I have had to postpone it until the end of February.  (If you live near Edinburgh, places are still available.) I knew there was a lot of work in running a class, but I don't think I understood how much. Still, we live and learn.
Having done the grunt work, I'm looking forward, with a little trepidation, to the pilot, and then to the class itself, which will be in August.
Flame Fan is 7" x11", and is worked on Congress cloth. The flames are all worked in couched Kreinik gold, using the same variegated Anchor floss. Stitching time was about 30 hours.

I have been busy on other things too. "The Big Project" has come to a temporary halt because I haven't had the git-up-and-go to move on to the next stage. Mr.G's tablecloth proceeds in small increments,


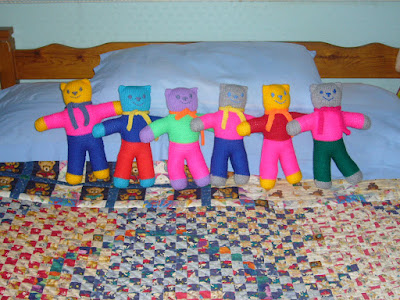
and another group of bears is off to a new home.

Not so many this time, which is good as I had so many other things going on, but the request for half-a-dozen was filled. They're obviously keen to get on their way, the fellow in the green trousers is already stretching his leg out towards the door.

Tuesday, 18 May 2021

May? Already?

One and a bit years after our first lockdown things are starting to look more positive. I have had both vaccinations and Jane-Beth gets her second today. Lockdown is easing, little by little. The pubs are starting to open and I am getting back into the garden. Not my Dad's, the house has been sold, but I have a couple of friends who need what muscle I can provide, so with a bit of decent weather I will soon start to get rid of my lockdown flab. 
And the dentist has reopened! What can I say? I dislike going, but I know it's necessary, and I haven't been able to go since March (last year).

I seem to have let this blog slip since the arrival of Covid. It's not that I've been doing nothing, but the time has been sucked up by other projects.
I have recently become a columnist for Needlepointers, the magazine of the American Needlepoint Guild. I was sort of volunteered for it, and it's been an interesting experience. The feedback has been positive too, which is a bit of a boost for the ego.
In an earlier entry I mentioned that my "Flame Fan" design has been selected as a class for the American Needlepoint Guild Seminar in 2022. I can see at least one column for Needlepointers and a future blog entry or two coming out of that!

"Would I mind if the other designs were offered to the Distance Learning Team?" I was asked. Of course I didn't mind. The ANG Workshop By Mail team asked if they could have "Golden Gyron". Ab-so-lootley! So it will be appearing in Needlepointers in a few months and will probably run from February to April 2022.


"Golden Gyron" is 5" x 5" and is worked entirely in gold, with the 50th anniversary of ANG in mind, but also as a sampler of stitches aimed at the less experienced needlepointer. I'm hoping it will go down well.

Work continues on 'The Big Project' which I hope to have finished for Seminar 2022. This is my first trial of how I might finish the beasts. The idea is to have them hanging, with the animal on each side, but with a different colour of background. I need to work on it a bit more! Luckily I have a couple of beasts that I'm not going to use, so I have material to practice on.


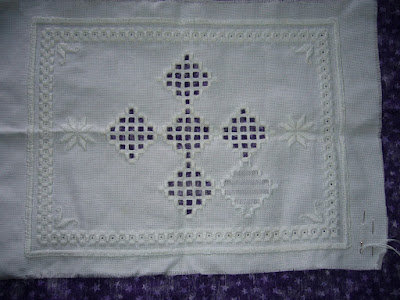
I've also been trying Hardanger, but my efforts so far are so execrable that I'd be embarrassed to put in a picture. Maybe next time.

On the down-side, no in person American Needlepoint Guild Seminar again this year. I'm not sure yet whether I will sign up for any of the on-line classes. However, I remain hopeful that next year at Tucson will go ahead (and that we'll be able to travel from Scotland).

Monday, 14 September 2020

Things We Do On Our Holidays

We attend the ANG Seminar as often as we can manage. Apart from the classes and the shoppertunities, we like that it moves around, which means that we get to see a different place each year. The days at Seminar are filled with classes, events and meetings, so we always try and arrive a few days early to do touristy stuff.

We walked where we could, and we found the Streetcars. That was fun, even if we did get on the wrong one and end up at the terminus. Still, we saw dozens of fine looking houses and beautiful gardens. Walking, I had the chance to admire the wrought-iron work on the balconies of houses. I particularly liked this one.


We also found our way (a fairly short walk from our hotel) to the World War II museum. It is big, it is impressive, and it is educational. It's not all 'Blood and Glory', with sections on The Home Front, war industry and a massive archive, as well as many items of the machinery of war. There were tanks, Jeeps, aeroplanes and trucks, and right in the main entrance, a Higgins Boat. And next to the main entrance was a really good Forties themed cafe.
I had heard of Andrew Higgins. Eisenhower is said to have referred to him as 'the man who won the war'. Higgins designed and built the thousands of landing craft required for the Pacific campaign and the Allied landings in North Africa and Europe.
Obviously the people of New Orleans think highly of him as one of their 'Sons' because the street that leads to the Museum is called:


We also visited the Confederate Museum. It was much smaller, perhaps more personal because of that, but equally interesting. Such places may be frowned upon by many, but I think it's important that they exist in some form or other to remind us that history has two (or more) sides, and that to forget it is to repeat it.

Then there's the food. We went with a group of needle pointers to a well known, I might say famous, restaurant that has been there since forever. The food was incredible, a total melt in the mouth experience, and they had good Scotch Whisky. I think I did cause a bit of a stir. The MD, a very nice chap, seemed to find this man-in-the-kilt quite attractive (maybe he just wanted to find out if the rumours about what Scotsmen wear under their kilts are true). Then there was the young lady with her partner who kept looking, and whose expression indicated that she wasn't sure, ours being a group of ladies of a certain age, whether I was a man in a skirt or a hirsute woman (I have a moustache.)
And there was a traditional Jazz band playing in the street outside. As the saying goes, I thought I'd died and gone to heaven.

But what about the classes? Of course I took classes and I'll write about them next time.

Saturday, 5 September 2020

Man The Builder

 In 2015 we visited Myrtle Beach, in 2016 we ventured further into The South. The American Needlepoint Guild Seminar 2016 was to be held in New Orleans. How could we not go? New Orleans! The name alone conjures up a vision of the exotic, yet at the same time, pictures of the aftermath of Katrina. So off we went, Jane-Beth and me, and a bottle of Auchentoshan, and of course my exhibition piece. 

My entry for the 2016 Exhibit was "Man The Builder", a design I had started on in July 2015. If you were at Myrtle Beach, you might have seen a mad-man sitting on the floor in the shop with a big design sheet, picking out threads. Yep, that was me. 


Original work must be submitted to the Exhibit accompanied by an Artist's Statement. That read:

The inspiration for "Man The Builder" came from a variety of sources; pre-Reformation stained glass, the warm gold of the stone of the Scottish Border Abbeys, our need for places of contemplation and ritual whatever our beliefs and 'Cathedral Window' quilting (which I could never get the hang of). "Man The Builder" shows the growth of places of ritual from the first standing stones, through the Henge, to the great cathedrals and monasteries of the Middle Ages.
We know from Archaeology that men built temporary shelters close to their sacred places at times of festival and, later, small permanent houses, probably for their Shaman, priests or rite leaders. 
As beliefs and needs changed, these buildings replaced the Henge and were slowly enlarged, or new buildings erected, growing in size and importance, the culmination being the great cathedrals.
My object was to show this process as it might have been illustrated in an old stained glass window, with pictures of the evolving edifices engraved into small panes of glass.
I chose to use silk and metals to emulate the warmth of the sandstone and the glow and reflections of light through the glass and onto the stone. I chose to stitch the mullions in Soie d'Alger as I felt it gave the warm effect I wanted. The central part of each mullion was padded to show the curve of the stone and I used wave stitch on the outer border to reflect the long chisel marks left on the stone by the builder as he shaped it with his rudimentary hand tools.
Old glass is uneven in both texture and colour so I chose to show this using a substantial layer of Neon Rays couched with silver or gold to emulate the speckles often seen in early church glass. I tried various methods of adding the "etched" buildings, none of which I found satisfactory until I found a collection of coloured lighting gels in my mother's stash. I found that I could obtain the desired effect of etching over glass by drawing the building on the gel, cutting out the outline and attaching it to the "glass".

Later, I was offered a different take on what I had stitched:
When we were simple folk, our God (I use this as shorthand for any form of deity or belief system) was with us and all around us. When we became settled, our God stayed with us and the holy person made his abode close to the place we considered most sacred to our God. Then the priests took over and built bigger and bigger houses and locked our God in them.
It was a lesson to me that people might see something in my work which I did not intentionally put there. It doesn't worry me. If someone finds something of meaning to them yet which I didn't deliberately put there, they are welcome to take it away with them. If nothing else, it shows that they took the time to consider what they were looking at.

"Man The Builder" was stitched on 18 count white mono canvas, using Soie d'Alger silk floss for the mullions and borders. The padded areas were stitched with three layers of padding cotton before the silk was laid over the top. The central motifs or 'glazed areas' are in Neon Rays. The highlights on the mullions and the 'lead' round the 'glass' are couched Japanese #8 gold and silver while the bosses at the points of the mullions are a Heavy Passing Gold we inherited from somewhere. The buildings were drawn onto yellow stage lighting gel using an indelible black pen and attached using small stitches of black thread.
The stitched area is 12" on each side and it took me 190 hours to design and stitch. I had a successful Exhibit. "Man The Builder" was awarded Third Place in Class, a Judges Choice Ribbon, and the "Creative Inspiration" Award.

I don't usually include lots of pictures of a piece, but it has been suggested to me that people like to see the progress of a piece of work. I don't take many pictures as I go, but here are a few I took when working on "Man The Builder".


My Doodle Cloth. The test of the padding is in the top right. If I was doing this again I would consider making the padding stitches longer and maybe deeper.


Padded Mullions (white) completed mullions in golden brown Soie d'Alger.


The full piece with padding.


The finished piece.


The ribbons.

Friday, 7 August 2020

(Polar) Bears Claw

Those who have been following my blog will know that I occasionally make quilts. This isn't one.

Someone recently asked me where I got my inspiration from. The best answer I could give was "Anything and everything. I never know when it will hit and what will trigger an idea until it comes to me." That's the way it works for me. As Thomas Edison said of Genius, as the light bulb went on above his head, it's 1% inspiration, 99% perspiration. 
I find that when the inspiration comes, the initial idea can be sketched out as a first draft in a few minutes. After that comes the blood, sweat and tears. I know where I am, and I know what I want to achieve, but once I get the image it can take hours to draw a final version which I think meets my idea.
Then I have a drawing. Keep going, there are still the threads and stitches to select. Usually I have already decided on colours, but then there's the colour balance to be considered. Once I have the drawing, the colours balanced in my mind, and the stitches applied to areas, I can then translate the drawing into a chart. What about size? Mostly, I find, I don't have to think too much about that as the design will tend to indicate what size the finished piece should be.

What about the Polar Bear?
I did promise one in the title, so here is my Polar Bear:


The inspiration came from a previous quilt, "6 Bears +1", which had a Bear's Claw pattern round the border. "You could do something with that in Needlepoint," I thought. 
The initial sketch was a single Bear's Claw, like the quilt. The next version extended it to four paws reducing in size, with a partial border, as though it was the corner of a quilt.
For this piece, the title came next. (Polar) Bear's Claw. Why Polar Bear? Who knows, I just decided Polar Bear, maybe because Polar Bears, like male embroiderers, are an endangered species.
It was the title which decided the colours I would use. Obviously, Polar Bears are white(ish) so there was a predominance of off-white, The live on ice floes and the floes are surrounded by the sea, so the sea had to be a dark blue, the ice a pale blue.
Jings! What next? The Stitches. The paws, being the obvious large areas, needed to be white and suggest a certain furriness so I used a woven stitch to give them bulk. When it came to charting them I decided that the size of the woven stitch should remain the same for each 'paw print' and only the area of the 'paw print' should reduce. I also decided that the claws should be couched Kreinik silver. Why? It just felt right. 
As this was based on a quilt pattern I looked for a stitch that had a woven-fabric quality to it for the background. If you don't know this one, it's called Darmstadt Stitch and it's dead easy. It also covers the area at quite a rate once you get in the swing of it.
Having in my mind already decided that the sea would be the border, or was it that the border would be the sea, I sought something smaller and tighter than the Darmstadt and went for a Scotch Stitch with a zig-zag in the same off white as the paws. I deliberately left the ends 'hanging' to imply that this was a corner of a quilt.
It took some time to balance the stitch sizes to the drawing and chart the final design, but by taking the time to count it all out on graph paper, it does mean that the chart is a close reflection of the finished article. I say close, because there is almost always that point where a stitch, as charted, really just doesn't look right and you have to wing it. All you've got to do next is stitch it.

I have to admit that this is one of the few pieces I have designed where I haven't made some fairly major alterations to the stitch plan just because what looks good on paper doesn't work on canvas.

(Polar) Bear's Claw is 5" square and was mounted in a 12" square cold steel frame with a pale grey mount. I used Soie d'Ager silks and a Kreinik metallic silver throughout. It took me 50 hours to design and stitch. (Polar) Bear's Claw was exhibited at the American Needlepoint Guild Seminar 2015.

The last thing I stitched was a two row border that matched the mounting board. I like to add a tent stitch 'framer's friend' to all my needlepoint. My framer says that it gives a smoother transition between the embroidery and the canvas and makes for a better looking mount, I do it because if the mount is just slightly off, the framers friend can disguise it.

And breathe.

Friday, 26 June 2020

Ammonite

In 2014 I took a fossil to the American Needlepoint Guild Seminar in Chicago.
I also took Jane-Beth.

Chicago is big and tall, and The Magnificent Mile is a bit breath-taking. That might have been something to do with having to walk with my neck twisted up to look at the architecture. The city is filled with new glass monoliths, but the older 'skyscrapers' in the centre are a glory of early 20th Century architecture. They're not just buildings, they are works of art. I particularly liked the reliefs on the walls, so I'm putting in pictures of a few of my favourites.


To appreciate Chicago, you really need to accept the crick in the neck.

Of course the main reason for going to Seminar was to stitch, to learn and to exhibit my latest piece of needlepoint.
In 2014 I exhibited "Ammonite"

"Ammonite" started life as a spiral doodle. It was a boring meeting. The spiral was joined by some curved lines and it reminded me of an ammonite. I love the shape of the ammonite, the regularity of the shape and the blending of colours where different chemicals have seeped into the shell and fossilised it.
When I got home I decided to up-scale it into a design roughly based on this fossil:


At an early stage I decided that although Ammonites have a regular mathematical progression in the expanding size of their compartments, my maths was never going to be up to the challenge, so I decided to go for effect rather than accuracy. My intention was to capture the spirit of the ammonite and produce a piece of work that was instantly recognisable as the fossil, not an exact copy of any specific fossil.


Ammonite measures 6" by 6" and took 100 hours to design and stitch. It is worked in basketweave on 18 count pewter canvas. The outline and the dividing lines between the chambers are done in Kreinik braids. The infill of the chambers is Soie d'Alger. I used six different colours on the infill of the chambers. To achieve the look of the chemicals seeping into the fossil I blended my threads. As the colours fade into each other I started with four strands of one colour, then three of that and one of the next, then two and two, then one of the first and three of the second.
The background, the 'mother stone' also uses thread blending to define the variety of shades and colours found in any piece of stone.

I was quite pleased with this, and so must the judges have been as they awarded it 2nd in Class. It's always nice to get the recognition.

Ammonite was later published as a chart, with instructions and stitch guide, in Needlepointers, September 2015, Volume XLIII, Number 5

Thursday, 4 June 2020

Daffodils

As "The Doctor" might say, it's a timey-wimey thing.
Somewhere in the Covid Lockdown I have lost a season. There I was, tending my Dad's garden through the winter, watching the first snowdrops and daffodils poking their green stems above the ground, and suddenly we're fewer than three weeks away from the longest day.
So I missed the mass of daffodils, golden or otherwise, that seem to erupt from every part of his garden.

Not that I've been idle during Lockdown, there's a whole big bit of stitching to be completed by 2021, and I'm working on 'Inspiring Leith'. I want to finish it in the next two weeks.

Maybe it was my mother's love of daffodils that inspired me to take "Daffodil Hill" by Lois Kershner at the 2013 ANG Seminar in Philadelphia.


As I'm sure I've stated previously in this blog, I don't do 'realistic' designs, by which I mean I don't design landscapes or figures. Maybe I'm afraid to try, or maybe its because when I get an idea and start to scribble, the outcome tends to be a little towards the abstract. Of course that might be down to my inability to draw a straight line with a ruler.
But I do like to have a go at other designers' landscapes.

"Daffodil Hill" was the first of two 'landscape' classes I took at this Seminar. Apparently, Daffodil Hill is a real place, with field after field of different types of daffodil. I'm sure Mr. Wordsworth would have been highly impressed.
What lessons did I take away from this class? Lois showed us how to show depth of field with shades and stitches and I learned how to make different sizes of French Knots to enhance the three dimensional effect. Honestly, I'm beginning to enjoy French Knots. Perhaps I need to see a therapist!

Daffodil Hill measures 7" by 5" and is on 24 count canvas and took 49 hours to stitch.

Thursday, 14 May 2020

How many sleeps 'till Christmas?

In this case, -2334.

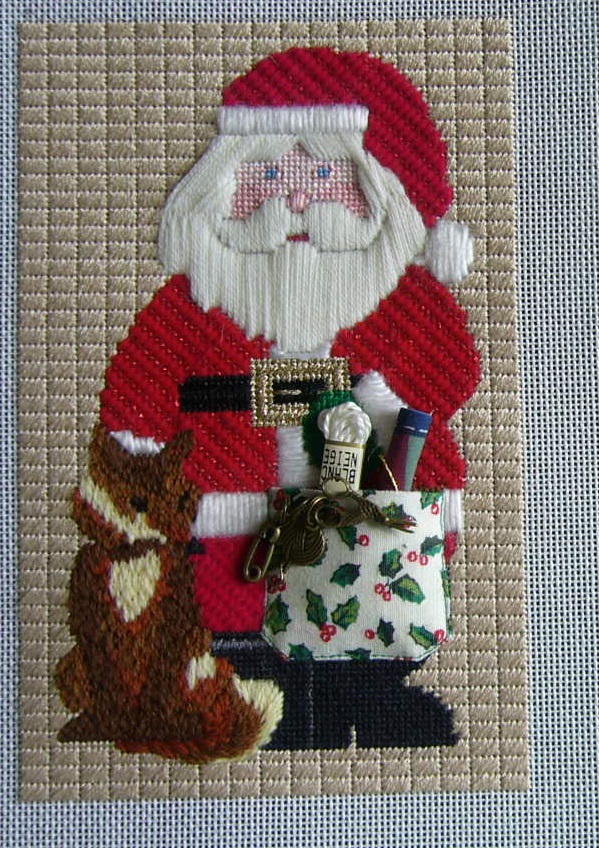
I stitched "Santa" and "Mrs Santa" in 2013 for the American Needlepoint Guild Auction of that year. All funds from the auction go to the Education Fund. This funds projects to make the public more aware of Needlepoint, to encourage them to try it, and to raise its profile as an art.

These were painted canvases, without a stitch guide, so although I had to pretty much follow the general colours indicated, I was able to choose my own stitches.


I have to admit now that I enjoyed stitching these little fellows so much that I forgot to record just about everything about them. I do recall that I mostly used DMC Medici, and the background is Soie d'Alger. I made their bags from some Christmas material I had on hand, and filled them with small sewing items. Each had a pair of scissors, some threads, not all of them visible in my pictures, and a roll of 'something to stitch on'.

Sometimes it's fun not to think about time and just let your needle run with your imagination.

Thursday, 16 April 2020

Stand Up for Christmas

While we were in Philadelphia I picked up a couple of pieces to stitch for the  ANG annual auction. It's a sort of bonus, a piece of needlepoint that looks like fun to stitch, but which I can then send back.
I ended up with two pieces, a Carol Singer and a Gate, both of which were part of a larger set of carol singers.


I am always impressed by wrought iron work and this gave me the chance to stitch some. Not surprisingly, I used a lot of black Kreinik metallic threads to get the dull sheen of the wrought iron, and to give the holly a shine I used more Kreinik in green and red. The cat is worked in DMC Medici. The gates and cat are worked in tent stitch, the background is stitched with a very fine machine embroidery silver in a diagonal skip stitch.

The second piece is one of the carol singers,


I used a wider variety of threads and stitches on the carol singer to show the different fabrics of her dress, fur muff, jacket, woolly hat and cloak. Like the gates, the background was completed in a diagonal skip stitch with the same fine silver.

I was able to see the completed set of carol singers before they were auctioned.


It took me just over 100 hours to stitch both pieces. I don't know how long it took to do the others, but if you were one of the stitchers on this set, well done!


Thursday, 26 March 2020

Petuniamonium

I attend the ANG seminar for many reasons. One of them is to take classes from top teachers and designers.
Petuniamonium is a Carlene Harwick design. I hadn't taken a class with Carlene, but when I saw the picture in the Seminar Brochure wanted to go on this one. What I loved about it was the simplicity of the basic outline design enhanced by the use of laid, couched and layered stitches.


There were stitches here I'd never heard of, Keenan Stitch, Sandy's Slide and Damask Darn. There were stitches I'd used before, but Carlene gave them a twist, for example, Nobuko Stitch using two threads, a floss and a metallic. There were lots of filling stitches such as Burden, Laid Filling and Small Burden. Practically every petal is different in some way and the variegated threads used for the leaves provide a touch of realistic shading. I just loved it from start to finish.

Petuniamonium is stitched on Congress Cloth and measures 11" x 13". It took me 47 hours to stitch.

Thursday, 12 March 2020

4:30:1836

"Remember The Alamo."
Not that I do, but when I heard that the American Needlepoint Guild Seminar for 2011 was to be in San Antonio it was probably the first thing that came to mind, closely followed by John Wayne throwing a burning torch into the magazine and "The Green Leaves of Summer".
San Antonio? Had to be!  To paraphrase Congressman Crockett, "Work can go to hell, I'm going to Texas!"

Next question. What was I going to submit to the Exhibit, the annual exhibition and competition? I was looking for some sort of connection, a link that would inspire a piece of work.
Long Story Alert!

There's an old Scottish myth (well not that old) about a Scotsman, fresh from 'The Old Country'. He gets off the ship in Texas and starts walking inland, looking at the place, wondering where to set down roots, when he reaches San Antonio.
The town is in a ferment. There are people building barricades and herding animals into 'yon auld kirk'.
Being inquisitive of nature he stops as passer-by and asks what all the excitement is about.
"Mister," he is told. "Texas has declared its freedom. General Santa Anna is marching towards us with an army of fifteen thousand men. There are one hundred men garrisoning the Alamo, and they aim to stop him."
"Weel 'jings'," quoth the Scotsman. "That's no fair. son. Thoosands against a hunner?"
"General Santa Anna says that when he arrives he will march over the Americanos in the blink of an eye."
"Och he does, does he," said the Scotsman. "Weel if yon's his attitude, I think I'll just hae tae ging in ta yon fort and gie them a hand."

Unlikely or not, I decided I'd do some research. I found the Alamo website. What I discovered was educational, enlightening and made me a little proud of my Scots blood.
There was not a Scotsman at The Alamo, there were four. I also discovered that 30 of the defenders had Scottish ancestry. This was less surprising considering the influx of Scots into America following the Jacobite Risings, but still quite a high proportion.

I was looking at pictures of The Alamo when inspiration, thankfully, struck. I had a link, and I had a general idea of the image I wanted to create. I even had a working title. 4:30:1836 was, if not born, in gestation.

The front view of The Alamo is an iconic image. I decided to take the curve, to ignore all the architecture apart from the front door and the upper window, and use the tartans of the four first generation Scots defenders. The door and window would be replaced with numbers, 30 for the defenders of Scots ancestry, 1836 for the year of the battle.


Simple? Well no, not really. I had to graph out each of the tartans, then I had to manipulate them slightly so that the horizontal and vertical lines met in a continuous pattern that drew the eye from one tartan to the next. My notes tell me that I took 70 hours to design this.

4:30:1836 is worked in tent-stitch on congress cloth using two strands of Soie d' Alger.  It is 7½ inches square and it took a total of 240 hours to stitch.
And I was awarded Ribbons!!!


The ribbon on the right is The Princess Grace Award for the best piece of basketweave/tent stitch in the Exhibit. I was overwhelmed, I was even speechless for a moment when it was announced. It was also awarded 3rd place in Class and, at the end of Seminar, the Delegates Choice Ribbon. The Princess Grace Award also comes with a rose:


This lovely piece of porcelain lives under a glass dome, and I admit to being so proud to have received it that I'm inclined to show it off.

I couldn't have done it without the four Scotsmen, so I'd like to introduce them:

Richard W. Ballentine was born in Scotland in 1814. He travelled to Texas from Alabama aboard the Santiago and disembarked on December 9, 1835. He and the other passengers signed a statement declaring, "we have left every endearment at our respective places of abode in the United States of America, to maintain and defend our brethren, at the peril of our lives, liberties and fortunes."

John McGregor was born in Scotland in 1808. McGregor lived in early 1836 in Nacogdoches. He took part in the siege of Bexar and later served in the Alamo garrison as a second sergeant of Capt. William R. Carey's artillery company. It is said that during the siege of the Alamo, he engaged in musical duels with David Crockett, McGregor playing the bagpipes and Crockett the fiddle.

Isaac Robinson was born in Scotland in 1808 and came to Texas from Louisiana. He took part in the siege of Bexar and later served in the Alamo garrison as a fourth sergeant in Capt. William R. Carey's artillery company.

David L. Wilson, son of James and Susanna (Wesley) Wilson, was born in Scotland in 1807. In Texas he lived in Nacogdoches with his wife, Ophelia. Wilson was probably one of the volunteers who accompanied Capt. Philip Dimmitt to Bexar and the Alamo in the early months of 1836. He remained at the Alamo after Dimmitt left on the first day of the siege.

Friday, 28 February 2020

Roofs and Domes

I stitched this for an American Needlepoint Guild Charity Auction. I have no information about the designer of this canvas, it came with no stitch guide, no instructions of any kind. I don't actually remember choosing this, so I'm going to blame it on Jane-Beth or one of our American stitching friends. I'm sure it was thrust into my hand with a comment along the lines of "see what you can do with that, clever-clogs".

What could I do with it?
It was a painted canvas, so the colours, roughly, were already set. I could have worked the whole thing in basketweave, letting the colours do the work of showing the design, but though that would have been much quicker, it would have been much less interesting. Instead, I decided that I wanted to throw stitches at it to give each building its own texture.


I can't claim to be well travelled, but I've been about a bit and I've noticed that not only do buildings in different countries and regions have different shapes, they have their own local textures. (Even modern concrete and glass has a different feel in different countries.) The buildings on this canvas looked as though they came from different places so, in my mind, they cried out 'Texturise me!'

I used a different stitch or variation for every building and roof, but used a Kreinik gold somewhere in every building to unify the whole. Looking back through my notes, I used Basketweave, Diagonal Brick, Lattice, Satin Stitch, Milanese, Brick, and Jaquard Stitch. The threads were Anchor and DMC, both floss and perle.
Because each area was quite small, I never reached the 'hate' stage on this piece, though as usual I did have to struggle with compensation in some places.

It took me 86 hours to stitch Roofs and Domes.

Thursday, 20 February 2020

Halloween

Every year the American Needlepoint Guild holds a Charity Auction of needlework donated by members.
One of the joys of stitching something for the auction is that you can choose a canvas that looks as though it would be fun to stitch but which you wouldn't necessarily want to own permanently. In 2010 I chose two different canvases. The first was Halloween. I don't know who the designer was, and there were no instructions or stitch guide, only the painting on the canvas.
I'd love to hear from anyone who recognises it.

Obviously, being Halloween, it had to be 'loud' and the letters had to be in the same stitch. I had the ugly pumpkin orange and just knew it was what I wanted. I considered making the O the same colour as the other letters, but decided that the silhouette witch would look better against the sickly yellow. The background had to be night-like, and in a stitch that was complementary but sat back from the letters and figures. It had to be a dark blue, black tends to be deadening, and grey would never have worked, neither supporting or clashing with the orange.

The figures were fun. I did most of them in tent stitch, but I used fluffy threads for the cats and the owl, and a variegated wool for the tree. The green of the goop from the cauldron had to be yucky of course and the pumpkins had to have lit up eyes and mouths. The witch, following the best traditions of wicked witches, had to have stripy stockings and purple hair.

Halloween, with apologies for the  over-run
It was fun to choose colours that went together, but didn't quite, if you follow me, and I enjoyed playing with ideas for the figures. It took me 88 hours to stitch Halloween.


Thursday, 13 February 2020

Crossing The Spectrum

This was the second of the two classes I took in Milwaukee. When I saw the picture in the Seminar Brochure I fell for the colour gradations. It is stitched on Congress Cloth using Splendor silks and Kreinik #4 braid. I love Congress cloth, and Kreinik and I don't think I'd used Splendor before I took this class.
Then I got to class and discovered thread blending. That was cool, and not a concept I'd really considered. Once I tried it I could see that it was both easy and difficult. The easy bit is to take two strands of one colour and one strand of another and stitch with all three. The difficult bit is to find colours that lend themselves to it. Sue Reed is an expert at it. I just followed the instructions, but I could see that it was another useful lesson.


The thread blending happens in the outer border where the colours merge as they zig-zag round the main design, which kind of reminds me of a portcullis. My poor photography does not do justice to the variety of stitches we used, Cross Stitch, Scotch Stitch, Slanted Gobelein, Tied Cross Stitch and Eyelets. I had lots of fun stitching this.

Crossing The Spectrum was designed and taught by Sue Reed. She has to be the most patient person I know, and one of the most knowledgeable on Needlepoint. She was always happy to answer questions and repeat demonstrations, and she was generous with needlepoint tips.

Crossing the Spectrum measures 7.25 x 7.25 inches and is framed up to 12" square. It took me 150 hours to stitch.

Thursday, 6 February 2020

Persian Star

Still in Milwaukee.
After tourism, Seminar. I took two classes in 2009, The first was "Persian Star", designed by Jane Zimmerman and taught by Leigh Shafer.

I chose this class for a number of reasons.
I've always been drawn to the geometric and I liked the design when I saw the picture in the Seminar brochure. Then I read the class description; Novelty Japanese fillings, novelty pattern couching on metallic foundation, Burden Stitch, Lattice on satin and layered satin patterns. What wasn't to like? What I did miss was that there was pre-work. Approximately 3 to 4 hours it said.
A word on pre-work. It has to be accurate. Get it wrong and you throw the whole design out of kilter, so don't hurry it or skimp on it. When the teacher tells you it will take so long, it's best to allow a couple of hours more. The pre-work on Persian Star, outlining the main shapes, took me 6 hours. When I'd finished I swore I'd never do a class with pre-work again.


Cool or what? The design is thread heavy, with layers of stitching one on top of the other. The Burden Stitch was indeed a burden until I got the hang of it, and the various lattices and fillings were a lesson in accuracy. One stitch out of line and it sticks out like a sore thumb.
Unfortunately, Jane Zimmerman, who created the stitches and the design, was unable to teach the class, but Leigh Shafer stood in for her and was an excellent substitute, cool, calm and patient. Under her guidance we tackled a little of each stitch and by the end of two days I was confident that I could finish Persian Star at home.

Persian Star measures 9½" square, mounted in a 15" square frame. Including pre-work and class time it took 132 hours.

Thursday, 30 January 2020

Milwaukee

Wisconsin, The Great Lakes, Miller and of course Harley Davidson. Where else might one go for a needlepoint seminar?

Milwaukee? Well why not? We like to see new places, and we like to meet new people. What we didn't expect was that all us Needlepointers would be sharing the hotel with participants in the Gay Olympics and Bikers in town for the Harley-Davidson 75th anniversary. What a great mix. We met some really nice people from the other groups, the Bikers and Olympians came to see what we were doing and many of us went to see what they were doing.

As usual, we arrived a few days early to do some sightseeing. One of the first things we noticed was how clean the streets were. I'm convinced they have a squad of people washing down the roads and pavements in the middle of the night.
We visited museums and galleries and we walked to most places. At the Pabst Mansion we admired lace and embroidery and learned about 'Pickles'. Apparently it's a Germanic thing, you have to hide a Pickle in your Christmas Tree. So we had to buy a pair of glass Pickles which get hidden in the tree every year.
Another port of call was The Milwaukee Art Museum. It was worth the walk just to see the building and watch the roof opening and closing. It's all to do with controlling the light levels to protect the exhibits, so I was told. It can go from fully open to fully closed;


It reminded me of the great white bird in "The Chronicles of Mavin Manyshaped" as it opened and closed.


One of the things I like about walking is that you get to stop and look at the street furniture and the buildings and as a designer you can pick up little gems of ideas to store away. It might be a manhole cover, a piece of ironwork or part of a building, but there's always something interesting to be seen.


Being there for the American Needlepoint Guild, there were classes and shopportunities.
Would I go back to Milwaukee? Why not? You can't see everything in one visit.

Thursday, 9 January 2020

Arrival Of Spring

I know, we're not even into the double digit days of January. Surely it's far too early to talk about Spring? Well apparently not. I took these pictures in my father's garden yesterday morning.

I have no idea what this bush is but it burst into flower sometime between Boxing Day and yesterday,


while these are a bit of a cheat. I moved them from another area of the garden in October and expected them to die back but they've kept flowering. I was impressed because where they are now gets the chill wind off the North Sea and has no shelter except the top layer of bricks.


And Snowdrops. Some of them are already showing buds, and at the front left is a solitary Daffodil making itself visible. How that got there I don't know but I love the idea that as things get moved and 'tidied' the odd volunteer bulb goes along for the ride and starts a new colony.


All of which is a lead in to "Arrival of Spring".
This was the second class I took during our visit to Houston.


"Arrival of Spring" is a Gail T Stafford design worked on Congress cloth using DMC, Gentle Art, Weeks Dye Works and Threadworx threads, Cashmere Stitch, Nobuko and many other stitches, including many, many French Knots.
This is not the style of piece I would design myself, which was one reason for taking the class. It's good to step out of your comfort zone occasionally and having taken a class with Gail a few years ago, I knew it would make me do that.
The sky is painted, not stitched, which was a 'fear' challenge - paint the sky without getting paint in the wrong places, onto your hands or (disaster) onto your kilt. It was easier than I expected, and fun.
The picture really doesn't do the design justice. The shades of green and the stitches used give a real three dimensional feel to it.

It took me 60 hours to complete this, and  I enjoyed almost every minute of it.